1.1 Installing Virtualization Software
Enable Virtualization in Windows and BIOS Settings
- First, verify whether virtualization is enabled or not on the windows system, if it is not enabled, enable it by navigating to Settings-> System -> turn Windows feature on or off.
- Now Select Virtual Machine Platform from the list of features and Click OK.
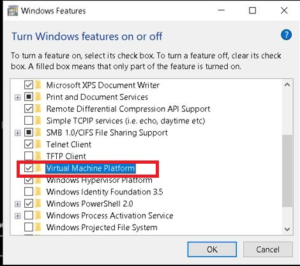
- Now Restart the machine to apply the changes.
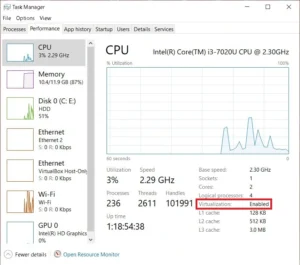
- After Restarting the machine, open task manager by clicking Ctrl+Alt+Del Simultaneously.
- Go to the performance Tab and inside CPU Section, Check whether Virtualization is Enabled or not. If not, start machine normally and go to BIOS Settings.
- In the BIOS, navigate to Security tab and locate Virtualization and then Enable Virtualization Technology.
- Next, save changes and system restart normally.
- After restarting, go to the task manager ->Performance tab and inside the CPU Section again to confirm that Virtualization Enabled.
Installing VirtualBox
To install VirtualBox on Windows Operating System, you must download the official installer from Oracle Virtualbox, resolve any missing dependencies such as Visual C++, and then start the installation procedure.
- Download the Installer
- Go to the Oracle VirtualBox Download Page by opening your browser. https://www.virtualbox.org/wiki/Downloads.
- Download the most recent.exe installer bundle by selecting Windows hosts.
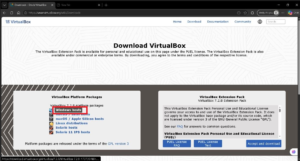
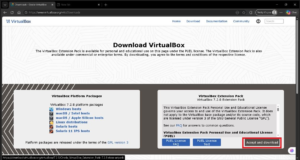
- (Optional) To enable USB 3.0 and clipboard sharing, download the VirtualBox Extension Pack from the same site.
- Install Prerequisites (If prompted)
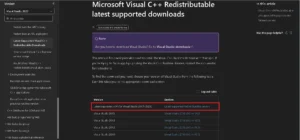
- VirtualBox requires Microsoft Visual C++ Redistributable.
- If the installer fails to execute due to a dependency problem, download and install the most recent vc_redist.x64.exe from the official Microsoft support page.
- Run the Installation Wizard
- Double-click the downloaded VirtualBox executable.
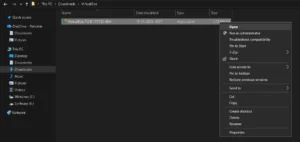
- Accept the Windows User Account Control (UAC) administrator prompt.
- Click Next on the first setup. Welcome screen.
- Select the default custom setup features and installation location, then click Next.
- Accept Network and Dependency Warnings
- Select Yes when warned about a temporary network interface disconnection.
- Select Yes to install missing Core dependencies or python bindings.
- Click Install to begin copying files to your local storage.
- Finalize Setup
- After the procedure is completed, click Finish.
- Ensure the Start Oracle VM VirtualBox after installation box is checked to launch the interface instantly.
Installing VMware Workstation
1.2 Setting Up OS
- Installing Kali Linux
- Basic Linux Commands
- User and Permission Management
1.3 Network Configuration
- Bridged Network
- NAT Configuration
- Host-Only Network